Editing photos has become a vital part of our everyday lives because it enables us to express our originality and provide visual representations of our perspectives. Whether you want to eliminate elements that aren’t needed or improve the composition, having the appropriate tools is essential. In this comprehensive guide, we will explore the world of free eraser tools for photo editing. By the end, you’ll have the knowledge and skills to elevate your editing game and create stunning images that captivate your audience.
The Benefits of Free Eraser Tools
When it comes to photo editing, using free eraser tools can provide several benefits. To begin, they allow you to remove undesired elements, distractions, or issues from your images, enabling you to create a cleaner and more aesthetically pleasing composition. Additionally, by eliminating stuff that can interfere with your subject, eraser tools allow you the chance to sharpen the focus on it.
How to Erase Part of an Image in Photoshop
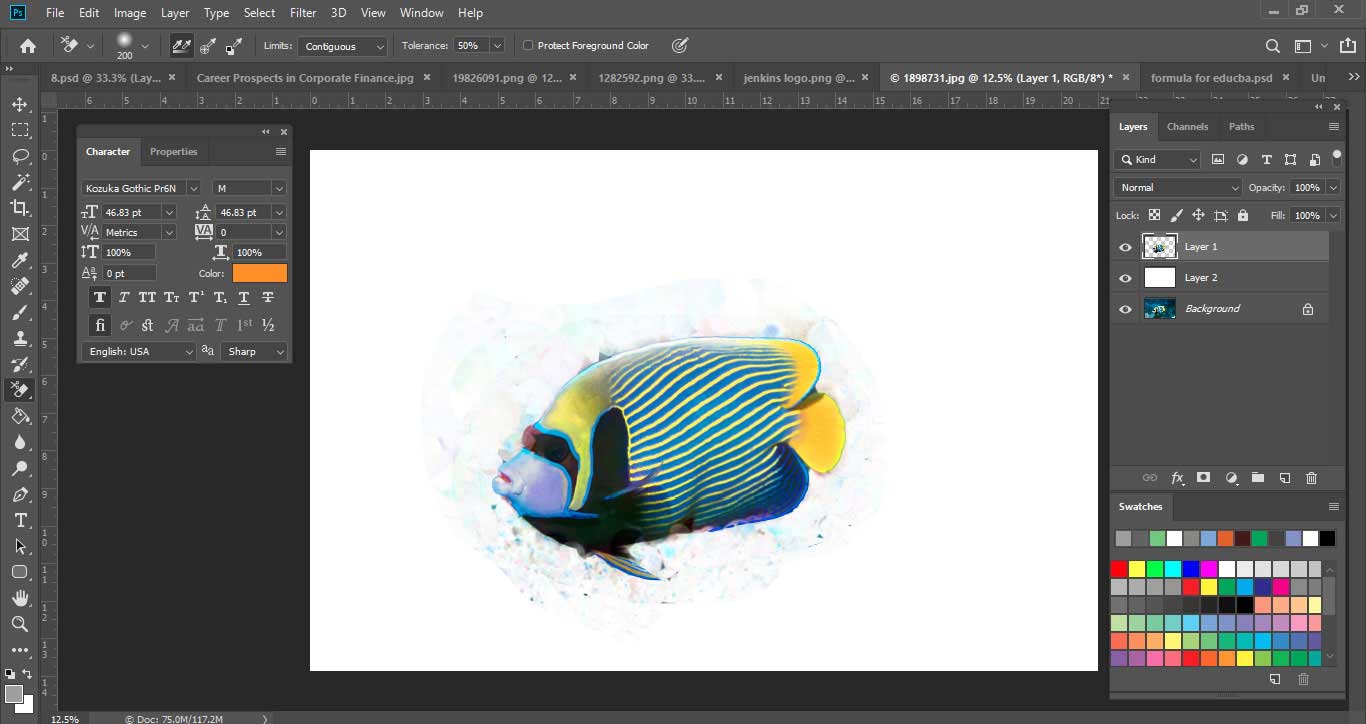
Photoshop is one of the most widely used photo editing software. It offers a range of tools for precise editing, including the Eraser tool. To erase part of an image in Photoshop, follow these steps:
- Select the Eraser tool from the Tools palette.
- Pick the brush shape and size that you prefer.
- Adjust the brush’s opacity and flow for greater control.
- Drag the Eraser tool across the desired area to delete it.
- Be careful not to delete too much, as it may be hard to undo.
Pro Tip: To get the desired results while using the Eraser tool in Photoshop, be cautious and practice with various brush sizes and opacities.
Exploring the Canva Eraser Tool
Canva is one of the most popular online design platforms, and it provides an easy-to-use eraser tool that enables you to remove undesired elements from your images. The eraser tool on Canva has an easy-to-use interface and can easily remove a background or particular areas of a picture.
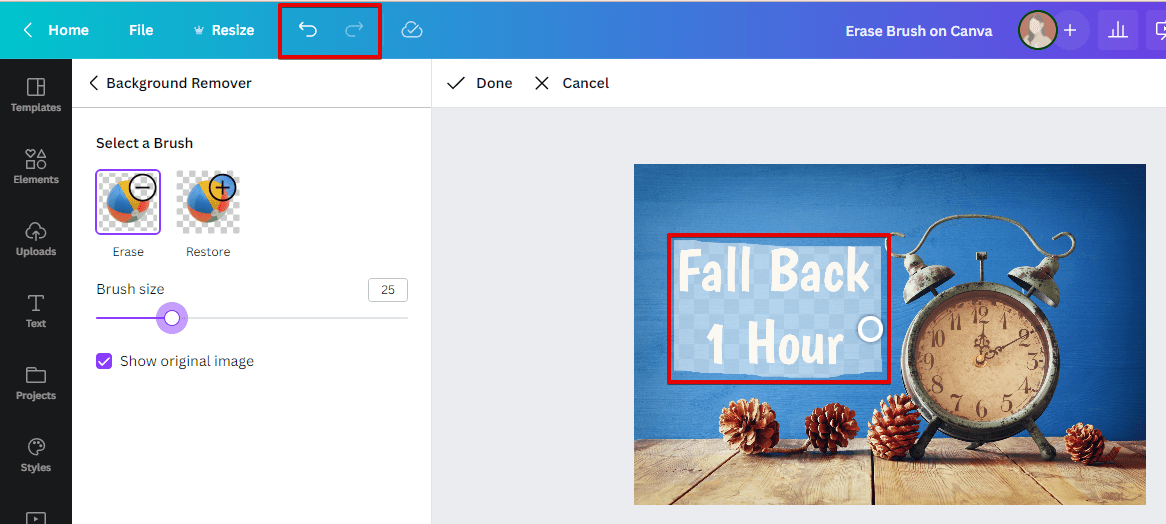
Step-by-Step Guide: Erasing Part of an Image in Canva
- Log in to Canva: Log in to your Canva account to get started. If you don’t have one, sign up for free and gain access to a wide range of editing features.
- Upload Your Image: Once you’re signed in, you can add the picture you want to edit. Canva supports many different picture formats, which makes it easy to use with your preferred photos.
- Remove the Background: Click “Edit Image” for editing options. Then, at the top of the screen, go to the Effects tab and click “Background Remover.” Give Canva time to process your request and remove the background from the picture.
- Select the Eraser Tool: After removing the background, you can open the eraser tool. It’s in the Background Remover menu, and you can get to it by clicking “Erase.” Change the size of the brush to make accurate changes.
- Remove the Desired Part of the Image. Click on the parts of the picture you want to get rid of. For larger areas, hold down the mouse button and move the brush over the elements to watch them disappear gradually.
- Save Your Image: Once you’re happy with your changes and have taken out the parts you want, save the picture.
Pro Tip: Try different brush sizes and use Canva’s easy-to-use interface to make desired changes.
In a world of photo editing, free eraser tools are handy because they let you eliminate unwanted things, improve compositions, and let your creativity flow. Whether you use the eraser tools in Photoshop or explore what the eraser tool in Canva can do, you now have the knowledge and skills to step up your editing game. So, use the power of free eraser tools for photo editing to let your artistic abilities shine.
Remember, editing your photos has many different ways, so don’t be afraid to try new things and push your creativity. With the right tools, you can make images that amaze people and leave a lasting impact on them.